
EKS – Elastic Kubernetes Services is a fully managed Kubernetes service offered by AWS. EKS become easy for us to run Kubernetes on AWS as we need not to setup or maintain our own Kubernetes control plane.
We’ll use command line interface to create an EKS cluster, provision of Kubernetes deployment and pod running instances of custom API developed using Python FastAPI framework. Command line utilities eksctl and kubectl are to be used for this dev work.
- Prepare or confirm the working ground
- Confirm kubectl installed on our device.
- If kubectl is not already installed please install it. (Below steps are for Linux)
- Download the
kubectlbinary for cluster’s Kubernetes version from Amazon S3- curl -O https://s3.us-west-2.amazonaws.com/amazon-eks/1.29.0/2024-01-04/bin/linux/amd64/kubectl
- Verify the downloaded binary with the
SHA-256checksum for your binary.- curl -O https://s3.us-west-2.amazonaws.com/amazon-eks/1.29.0/2024-01-04/bin/linux/amd64/kubectl.sha256
- sha256sum -c kubectl.sha256
- Above command will give
kubectl: OK
- Make downloaded kubectl binary as executable
chmod +x ./kubectl
- Copy the binary to a folder in our
PATH.mkdir -p $HOME/bincp ./kubectl $HOME/bin/kubectlexport PATH=$HOME/bin:$PATH
- Add the
$HOME/binpath to shell initialisation file to get it pre-confgiured when we open a shell.echo 'export PATH=$HOME/bin:$PATH' >> ~/.bashrc
- Verify kubectl version
kubectl version --client
- Download the
- Install ekcstl. Ref link https://eksctl.io/installation/
- Check eksctsl version
eksctl version

- Create EKS cluster- AWS EKS
- To check options available to create EKS cluster
eksctl create cluster --helpI have used following command as per my minimal dev poceksctl create cluster --name anj-dev --region us-east-1 --version 1.29 --nodegroup-name anj-workers --node-type t3.micro --nodes 3 --nodes-min 1 --nodes-max 4 --managed- To execute above command I used Environment variables to set access and security key. e.g.
export AWS_ACCESS_KEY_ID=MY_ACCESS_KEY
export AWS_SECRET_ACCESS_KEY=MY_SECRET_ACCESS_KEY
export AWS_DEFAULT_REGION=us-east-1 - It takes around 10 minutes to create the cluster. During its creation CloudFormation template stack is to be reviewed. When
eksctlcommand is used to create cluster it internally usage CloudFormation stack to setup. Therefore if we encounter any issue, check CloudFormation console or try ‘eksctl utils describe-stacks –region=us-east-1 –cluster=anj-dev’ 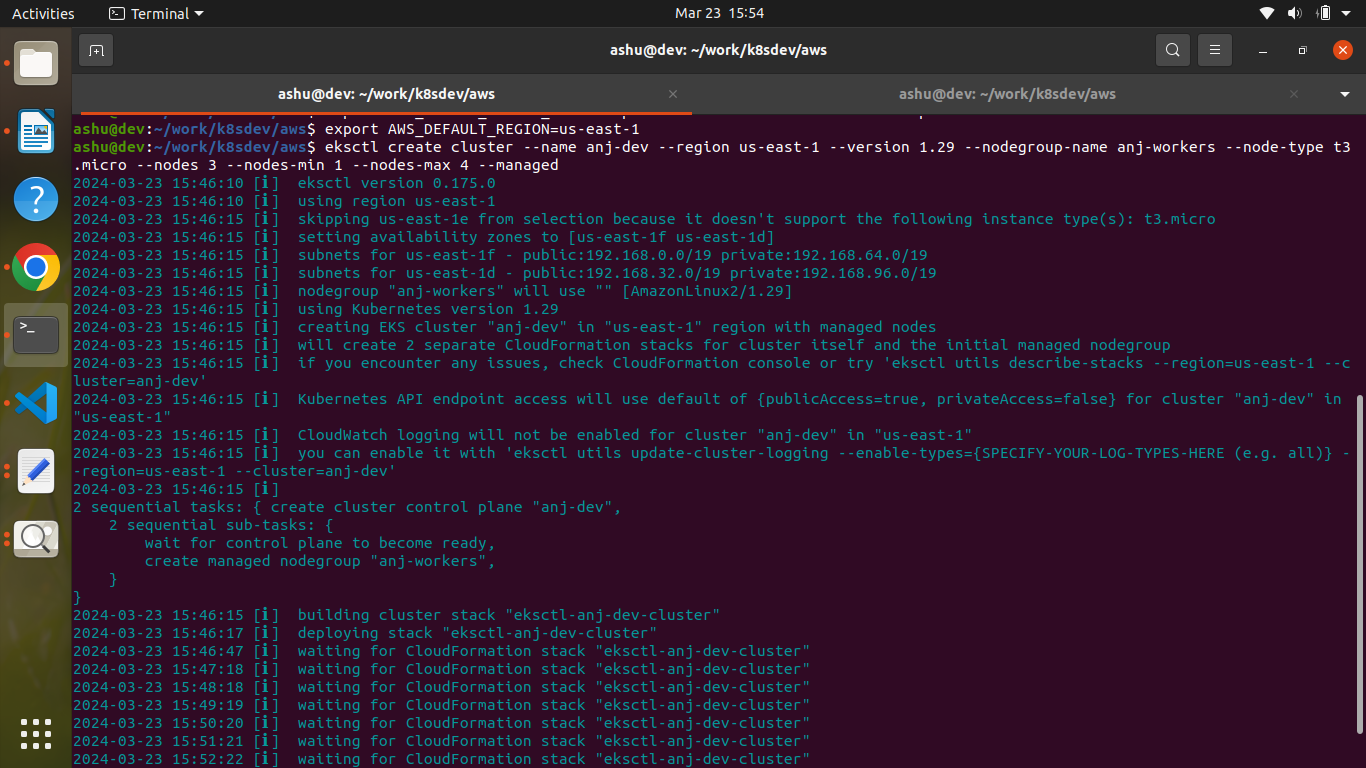
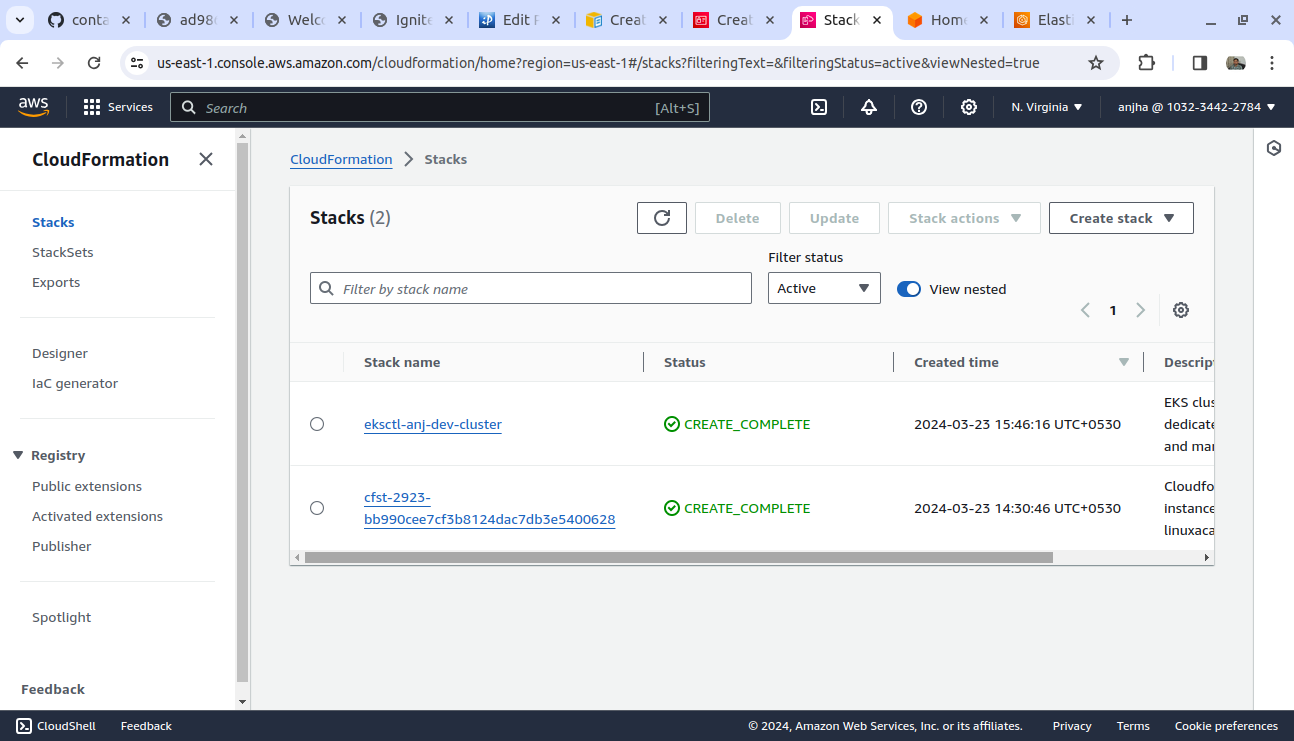
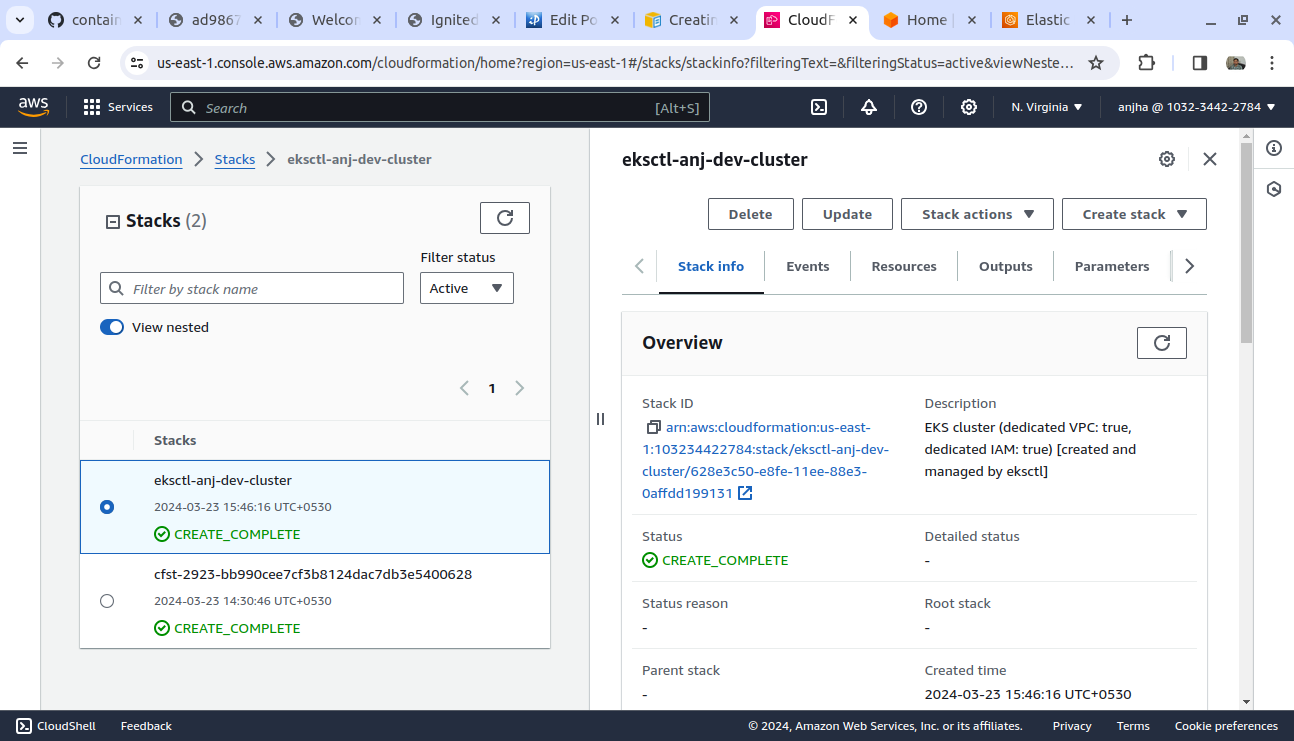

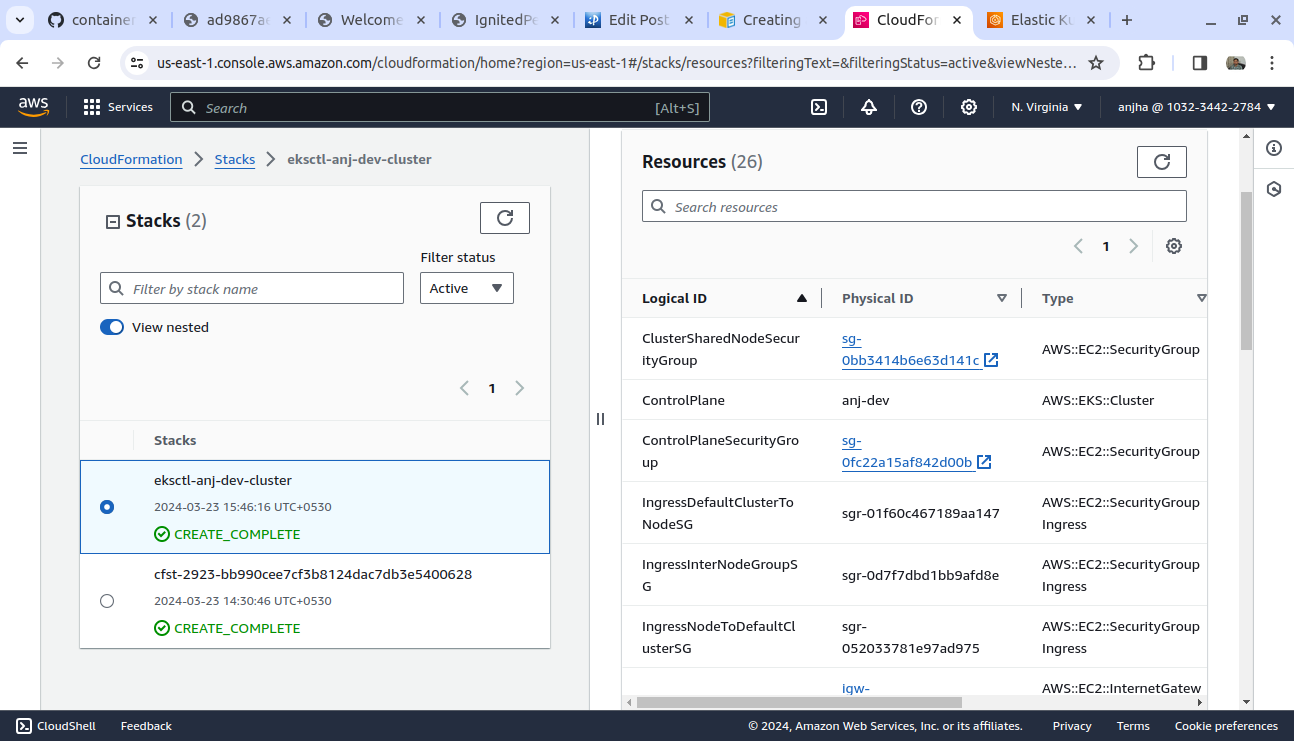

- When we get confirmation that cluster is created we can check it at console and with command
- $ eksctl get cluster
NAME REGION EKSCTL CREATED
anj-dev us-east-1 True
- $ eksctl get cluster
- Update the kubeconfig at your dev box
$ aws eks update-kubeconfig –name anj-dev –region us-east-1
Added new context arn:aws:eks:us-east-1:509123558864:cluster/anj-dev to /home/ashu/.kube/config
$kubectl get nodes
NAME STATUS ROLES AGE VERSION
ip-192-168-12-252.ec2.internal Ready7m44s v1.29.0-eks-5e0fdde
ip-192-168-25-171.ec2.internal Ready7m52s v1.29.0-eks-5e0fdde
ip-192-168-54-44.ec2.internal Ready7m55s v1.29.0-eks-5e0fdde
- When creation is completed, use “
kubectl get svc” and verify cluster service is there
$ kubectl get svc
NAME TYPE CLUSTER-IP EXTERNAL-IP PORT(S) AGE
kubernetes ClusterIP 10.100.0.1443/TCP 24m>
- To check options available to create EKS cluster
- After above state, EKS cluster is ready and we can proceed to deploy service and applications.
- Deploy service:
$ kubectl apply -f ./fastApi-service-lb.yaml
service/anjhello-svc created
$ kubectl get svc
NAME TYPE CLUSTER-IP EXTERNAL-IP PORT(S) AGE
anjhello-svc LoadBalancer 10.100.150.7 a4978a7a4e6804757adce26d8eed41e9-1189899995.us-east-1.elb.amazonaws.com 8080:30426/TCP 29s
kubernetes ClusterIP 10.100.0.1443/TCP 27m - Deploy application $ kubectl apply -f ./fastApi-deployment.yaml
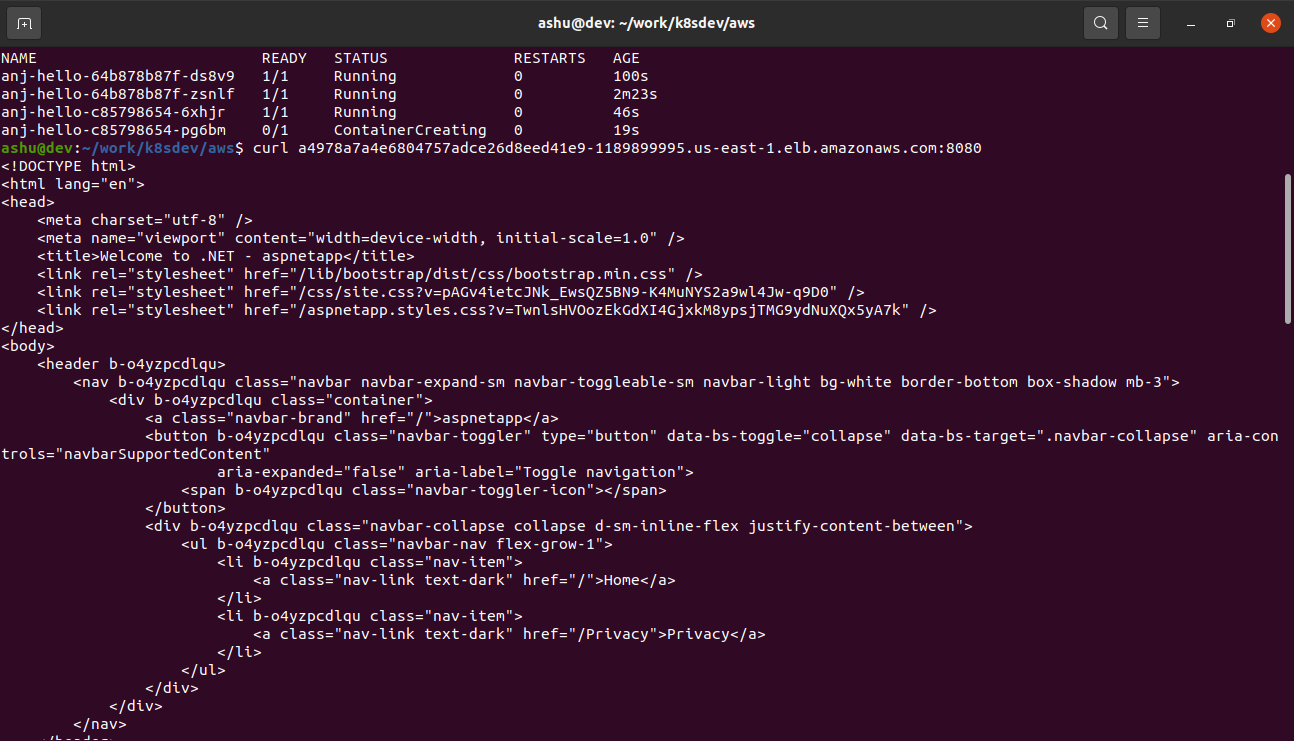
kubectl get pods NAME READY STATUS RESTARTS AGE
anj-hello-8547d9d654-49db4 1/1 Running 0 3m43s
anj-hello-8547d9d654-fjs2r 1/1 Running 0 3m43s
anj-hello-8547d9d654-fp57c 1/1 Running 0 3m43s
- Test the application using curl and browser UI. Host to be used is what we get EXTERNAL-IP via its service.
$ kubectl get svc
NAME TYPE CLUSTER-IP EXTERNAL-IP PORT(S) AGE
anjhello-svc LoadBalancer 10.100.150.7 a4978a7a4e6804757adce26d8eed41e9-1189899995.us-east-1.elb.amazonaws.com 8080:30426/TCP 14m
kubernetes ClusterIP 10.100.0.1443/TCP 41m
s$ curl a4978a7a4e6804757adce26d8eed41e9-1189899995.us-east-1.elb.amazonaws.com:8080
{“Greetings”:”AnjLab”}
curl a4978a7a4e6804757adce26d8eed41e9-1189899995.us-east-1.elb.amazonaws.com:8080
{“Greetings”:”AnjLab”}
curl a4978a7a4e6804757adce26d8eed41e9-1189899995.us-east-1.elb.amazonaws.com:8080/hit/1?query=ashuapi
{“hit_id”:1,”query”:”ashuapi”} 

- After testing my own Python based application I am trying an aspnet based app from sample microsoft aspnet image and deployment manifest file I have updated the following block to mention the aspnet image.
spec:
containers:
– name: sample-aspnet
image: mcr.microsoft.com/dotnet/samples:aspnetapp 
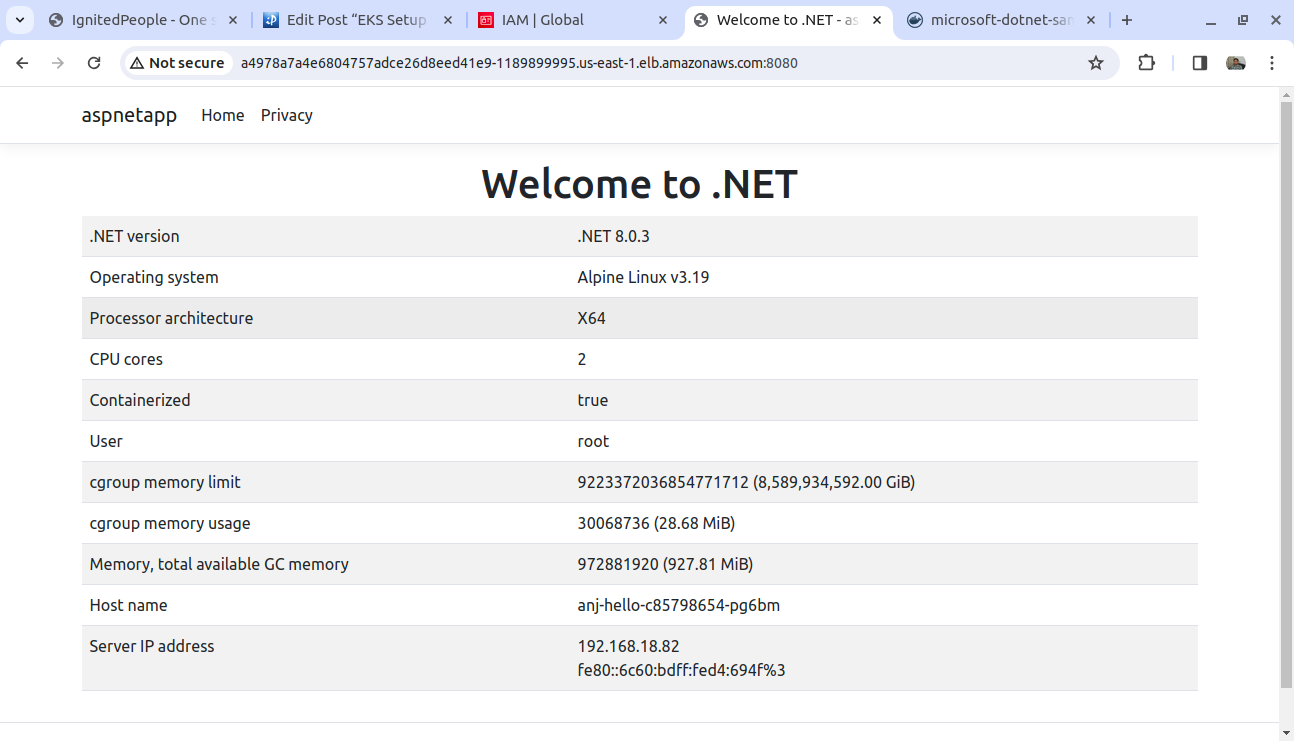
With the Above tests we have completed two version of API tests.
After observation do not forget to delete the cluster.
$ eksctl delete cluster --name anj-dev --region us-east-1